Hey beauties! Here's how to take apart your Dinair airbrush and give it a really good cleaning, and some tuning up! It may look hard, but I promise it's super easy and once you do it, it'll be easier and easier. The better you take care of your airbrush, the longer it will last and better it will perform!:)
Here's what you'll need:
- tweezers
- Dinair airbrush cleaner (for water-based makeup ex. Dinair Glamour)
- rubbing alcohol (only if you're cleaning out silicone-based makeup ex. Dinair Paramedical)
- q-tips
- tissue, paper towel, towel, or rag of some kind (to catch the stuff you spray out, and to wipe your hands)
- Dinair airbrush lubricant or petroleum jelly ex. vaseline
- Dinair airbrush cleaning caps (for overnight cleaning without the jar)
- Dinair docking jar or any cup or jar filled with water (for over-night cleaning without the caps)
- rubber band
- plate or tray (some surface to work over that could catch any little pieces that fall during maintenance
Some important things to remember:
- Don't put the lube or Vaseline into the airbrush, it will ruin the airbrush! ONLY put it on the parts I show in the video!
- Be very gentle with the needle tip!
Here's the video.:)
Saturday, September 24, 2011
Wednesday, August 3, 2011


Tuesday, August 2, 2011
enter makeup diary's giveaway!!!!:)
http://www.makeupdiary.org/2011/08/makeup-diarys-huge-just-because-thank.html
there's the link, she's WONDERFUL!
there's the link, she's WONDERFUL!
Wednesday, July 20, 2011
Tutorial- Electric Black Eye


Products used:
- urban decay primer potion
- nyx jumbo eyeliner pencil (milk, rocky mountain green)
- inglot eyeshadow (lime green, forest green, deep plum, white, aqua blue)
- urban decay eyeshadow (purple)
- wet n wild mega liquid liner (black)
- lash accelerator mascara
Tuesday, July 19, 2011
apologies for my lack of posting/videos!
i've been working on some things for you guys and also... drumroll please...
i got a job as a makeup artist and esthetician at a salon nearby!:)
so i've also been doing stuff for that and i had to talk to my old job and blah blah blah...
okay no more excuses! i will be posting some videos tomorrow night!
until then, here's the before and after pictures of my new hair!
i got a job as a makeup artist and esthetician at a salon nearby!:)
so i've also been doing stuff for that and i had to talk to my old job and blah blah blah...
okay no more excuses! i will be posting some videos tomorrow night!
until then, here's the before and after pictures of my new hair!

Wednesday, July 6, 2011
Secret Wonderland inspired tutorial


inspired by this bottle lol

Products used:
- monistat anti-chafing relief powder-gel
- murad primer
- benefit porefessional
- garnier nutrisse anti-dark circle roller (tinted)
- dinair airbrush foundation
- maybelline dream matte powder
- urban decay eyeshadow primer potion
- nyx eye pencils (milk, strawberry milk, purple)
- inglot eye shadows (light blue with glitter, white, matte black)
- urban decay eye shadows (alice in wonderland book of shadows: in wonderland, underland)
- sugarpill eye shadows (dollipop, afterparty)
- rimmel lash accelerator mascara
- ardell fashion lashes (glamour)
- tarte amazonian 12-hour blush (dollface)
- rimmel lipstick (rose blush)
Sunday, July 3, 2011
Summer Fun Look!


Products used:
- monistat anti-chafing relief powder-gel
- murad primer
- benefit porefessional
- garnier nutrisse anti-dark circle roller (tinted)
- dinair airbrush foundation
- maybelline dream matte powder
- urban decay eyeshadow primer potion
- nyx eye pencil (milk)
- nyx eye pencil (baby blue)
- inglot eye shadow (glitter yellow, glitter aqua, glitter lime green, white, matte black [not the actual names, eye shadows are numbered and confusing])
- jordana eye liner (blue)
- beauty rush liquid glitter eye liner (gold)
- nyx glitter (gold)
- rimmel lash accelerator mascara
- ardell fake lashes
- tarte amazonian clay 12-hour blush (blissful)
- revlon lipstick (fuschia)
Wednesday, June 22, 2011
tinted moisturizer!
Tinted moisturizer is an amazing alternative to foundation in the hot summer!
Products used:
- monistat anti-chafing powder-gel (as primer)
- physician's formula healthy wear tinted moisturizer (fair-light)
- benefit porefessional
- garnier nutrisse skin renew anti-dark circle roller (tinted)
- maybelline dream matte powder
Wednesday, May 11, 2011
E.L.F. Eye Shadow Duos
There are so many eye shadows out there, and everyone automatically assumes that the more expensive, the better. That's definitely not always the case. I fully admit that I am soooo cheap. However, I'm also extremely picky about quality. E.L.F products have had a bad reputation in the past, but I am finding that they've truly improved their products, and a lot of them are fantastic and at SUCH a great price. I bought a few of the eye shadow duos recently, and I have found that I love them more than some of my inglot or urban decay shadows (which were my ultimate favorites).
They're $1 each. No, I didn't forget a zero. Just a dollar, for an amazing, pigmented, great amount of product.
I own three duos- Mocha Swirl, Butter Pecan, and Black Licorice.
Here's the swatches over an eye shadow base:

The first two are Butter Pecan, the middle two are Mocha Swirl, and the last two are Black Licorice.
Butter Pecan has a medium/dark brown and a beige. The brown is matte and the beige is a bit shimmery. They're wonderful for a quick neutral eye.
Mocha Swirl has a light pink with some gold in it (gorgeous!!!!) and a light brown. They're unique colors that could add a little pop of color, without getting too crazy.
Black Licorice has a silver and a dark black. Both have glitter. The black is AMAZING. The glitter is throughout the entire shadow, and I actually swatched it and compared it to my glittery black inglot color and the E.L.F black is definitely way more pigmented and wayyyy more glittery. You can't see it in the picture so much, but it's amazing.
All of these colors were swiped once with my brush before applying it on my hand. You get so much color. I like to keep the Black Licorice and the Butter Pecan in my little travel makeup bag, just in case I need a quick neutral or smokey eye.
These are amazing!<3 Go get them nowwww.:)
Wednesday, May 4, 2011


Airbrush Foundation video!
I already showed a post with before and after pictures, but this is an actual video so it's much better.:)
And here's some pictures, too!

Friday, April 29, 2011
Giraffe Print Tutorial!
This was such a fun look! My next video will be recorded with an HD camera, not my webcam, so you will be able to hear me better, and see better! Promise.;)
Products used:
lancome eye shadow base aquatique
inglot eye shadow colors used:
351 MATTE
35 SHINE
54 AMC
405 PEARL
25 SHINE
376 MATTE (as liner)
jordana cosmetics fabuliner in 02 brown
rimmel london lash accelerator mascara
dinair airbrush foundation
monistat anti-chafing gel (as a primer! ...seriously)
clinique pore minimizer instant perfecter primer (on t-zone)
loreal matte powder
10 colors blush palette bh cosmetics
6 colors contour and blush palette bh cosmetics
revlon brow fantasy in dark blonde
maybelline shinesensational lip gloss 05 peach sorbet
pictures:)


Tuesday, April 19, 2011
Bassu Gold Oil by Surface Hair- Review!

Surface is proud to present its newest styling product--BASSU GOLD.
-Nature's perfect OIL for medium to coarse hair.
-Contains Argan & Babassu Oil which helps penetrate, restore, and intensify natural shine while providing Hydration & Protection.
-Helps to shine, soften and smooth hair.
-Free of Artificial Color.
^ Description of product:)
I had the opportunity to try out this product, and oh my goodness, am I EXCITED about it! So, let's be honest, when I read "OIL" I was very worried. My hair gets greasy super easily and typically I run away from those products because for me, any product that is oil-based makes my hair look like I took a swim in an oil refinery- even if I use the tiniest drop. However, I thought I would give it a shot! This product is AMAZING. I swear, I have the weirdest hair type ever. My hair looks extremely thin, dull, and frizzy. When you feel my hair, it feels so thick. It holds on to water like you wouldn't believe, and takes about 45 minutes to blow dry. No matter what I do, it stays frizzy. I hardly spend any money on hair products because they never ever work. The first thing I noticed was the packaging, the product doesn't come out too fast at all. I love the cap, I'm not sure what it's called, but it just twists slightly to allow the product to open and then you just turn it slightly back to lock it. I thought the product would be really thick and sticky, but it's not at all. You don't have to scrub your hands to get the traces of oil away, it just seemed to melt into my hair completely. Something I found interesting was when it comes out, it looks just like egg yolk! Which may seem gross, but it doesn't smell or anything and it feels nice. You only need a tiny drop. After I blow dried my hair, I realized my hair was SO shiny and felt so amazing! AND NO FRIZZ! The only thing I disliked, is that it doesn't feel moisturizing when you put it in wet hair. I like my hair to feel silky immediately. But it was just fine, I just sprayed some of my leave-in conditioner.:)
I give this product FIVE STARS!!!!:)
Disclaimer: This product was sent to me by the company to review. All of the opinions expressed in this article was my true opinion, I was not told what to say.
Wednesday, April 13, 2011
Eye Makeup Look Inspired By Katy Perry's New Music Video!

I'm going to start posting YouTube tutorials soon. But until then...
Apply an eye shadow base.
Using a white eyeliner pencil, fill in your entire lid. Make it as smooth and even as possible.
Using a stiff shadow brush, pack a white eyeshadow all over your lid.
Use a brush with a nice point to apply a dark blue eyeshadow and create that outer point.
Then using a crease brush, put the dark blue into the crease. I applied might damp, it makes a huge difference in how dark and vivid the color is.
Using a light skin tone color and a stiff brush, highlight your brow bone and soften up that blue on the top so it looks gradient and not so harsh.
Taking a black gel eye liner, line your upper lash line and wing it out.
Line your inner corner of your eye and underneath your lower lashline with a white eye liner pencil, wing it out below the black liner, leaving a little triangle space in between.
Go over the white liner with a white eyeshadow.
Line your eyes below the white eyeliner with a wet dark blue eyeshadow or a blue eye liner, meet it up with the winged out white liner.
Apply hot pink eyeshadow below the blue eyeliner and in the space between the black and the white eye liner.
Apply false black lashes.
Use Lash Accents or cut full size lashes (hot pink colored ones) and apply those on the outer lash line.
Eyeshadow used in this tutorial was used by Sugarpill Cosmetics!<3
YAY!
Monday, April 11, 2011
Airbrush Makeup, foundation of choice.
So many years, time, and money have been wasted on stupid foundation that didn't work for my skin. It either didn't cover enough, or slid off my oily face in this Florida humidity the second I stepped out onto my front porch. I couldn't touch my face at all, or my makeup would be completely off. It was stupid. Not to mention my dirty foundation brushes! Yikes. Come one, I'm at 18 year old girl. I hate cleaning my room and my car, why would I want to spend a half hour cleaning my foundation brushes (which I swear hold an entire bottle of my foundation, at least it seems like it with how long they take to clean!). I'll admit- I was way too lazy to keep up with that. So that would lead to nasty bacteria-carrying brushes, and rub (irritate) the brush onto my blemishes, attempting desired coverage, which would be hopeless for me anyways.
Then, I got my Dinair Airbrush system. Life. Changing.
I have the cute hot pink one, I mix half Vanilla and half Olive Beige. Dinair foundation sets almost instantly, and even in this life-sucking Florida humidity, I don't even need powder to set it. The only time I ever set it with powder is if I have a long work day or if I know I'll be running around. I sit there and watch as my blemishes literally disappear from site. My face has cleared up so much since getting my machine in December. It looks so natural. The makeup covers my dark circles. The application is so quick and easy. There's no harsh or gross scent. I don't have a complaint. I love it so much, it's my favorite of all of my cosmetics. I love watching my clients' faces when they see how flawless their face looks after I use it on them. It's just amazing in every single way.
Here's the (scary) before picture:

Here's the happy after picture: (excuse the window light hitting my forehead!)
 Yayyyyyyyyy!:)
Then, I got my Dinair Airbrush system. Life. Changing.
I have the cute hot pink one, I mix half Vanilla and half Olive Beige. Dinair foundation sets almost instantly, and even in this life-sucking Florida humidity, I don't even need powder to set it. The only time I ever set it with powder is if I have a long work day or if I know I'll be running around. I sit there and watch as my blemishes literally disappear from site. My face has cleared up so much since getting my machine in December. It looks so natural. The makeup covers my dark circles. The application is so quick and easy. There's no harsh or gross scent. I don't have a complaint. I love it so much, it's my favorite of all of my cosmetics. I love watching my clients' faces when they see how flawless their face looks after I use it on them. It's just amazing in every single way.
Here's the (scary) before picture:

Here's the happy after picture: (excuse the window light hitting my forehead!)

Wednesday, April 6, 2011
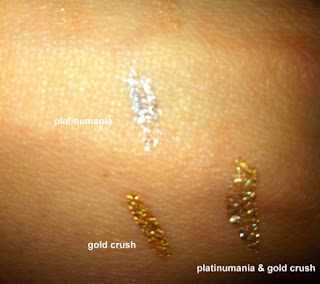
Victoria's Secret Liquid Glitter Liner Review and Swatches!
There are so many glitter liners out there that when applied, do not look glittery at all, but in fact flat and goopy and disappointing. Victoria's Secret Liquid Glitter Liner is NOT going to be one of those cosmetic items that you hate and then toss to the bottom of the makeup bag. This liner will become your new, go-to liner for any and every occasion. It applies smooth and every little bit is glittery and sparkley. The result is so beautiful. The applicator is fantastic, you can apply the thinnest line for subtle shimmer during the work/school day, or a thick bold line for a fun night out! It stays on strong! What's even cooler? You can apply one color on top of the other and it will look like your own custom made color, perfect for matching every color in your outfit that day! Versatile cosmetics are the best.:) You'll definitely be going back for every color once you try your first one. I bought two the first time, pictures of those swatches are below.:) I will definitely be going back for more!

Tuesday, February 22, 2011
Sally Girl swatches!
So today after class I went by Sally's Beauty Supply. They had a sale on the Sally Girl eyeshadows, buy five get one free. They're 99 cents, 94 cents at the Beauty Club price, so I thought since they were so cheap I may as well try them out. I grabbed Rose, Latte, Beige, Glow Green, Aqua, and Coral. I was extremely disappointed with Latte, it's yellow. It doesn't show up AT all. It wasn't even worth showing you the swatch. But then again, I was expected much out of them. Maybe Latte would look better applied wet? I'll try that and let you know. I was more than happy with Rose, Glow Green, and Coral. I had to kind of rub Aqua a couple of times, but it's a pretty color.:) And Beige would make a great color for the brow bone or inner corner of the eye.
Here's some pictures! (I apologize at how terrible these are, bare with me, this was my first time doing this. And by "this" I mean blogging and taking pictures of swatches.)
Here's some pictures! (I apologize at how terrible these are, bare with me, this was my first time doing this. And by "this" I mean blogging and taking pictures of swatches.)
 | |||
| The picture is refusing to rotate, I'm new at this, I apologize. But here's what they look like. They come individually, but you can connect them. Kind of cool! |
 |
| Glow Green! I absolutely love this green! I was so excited about this! The only good green I have is for the Urban Decay Alice in Wonderland book of shadows. And this one has glitter in it! |
 |
| Rose! This is a beautiful pink. It could even work on the cheeks.:) |
 |
| Beige! This would make a nice brow bone color or an inner eye corner color.:) |
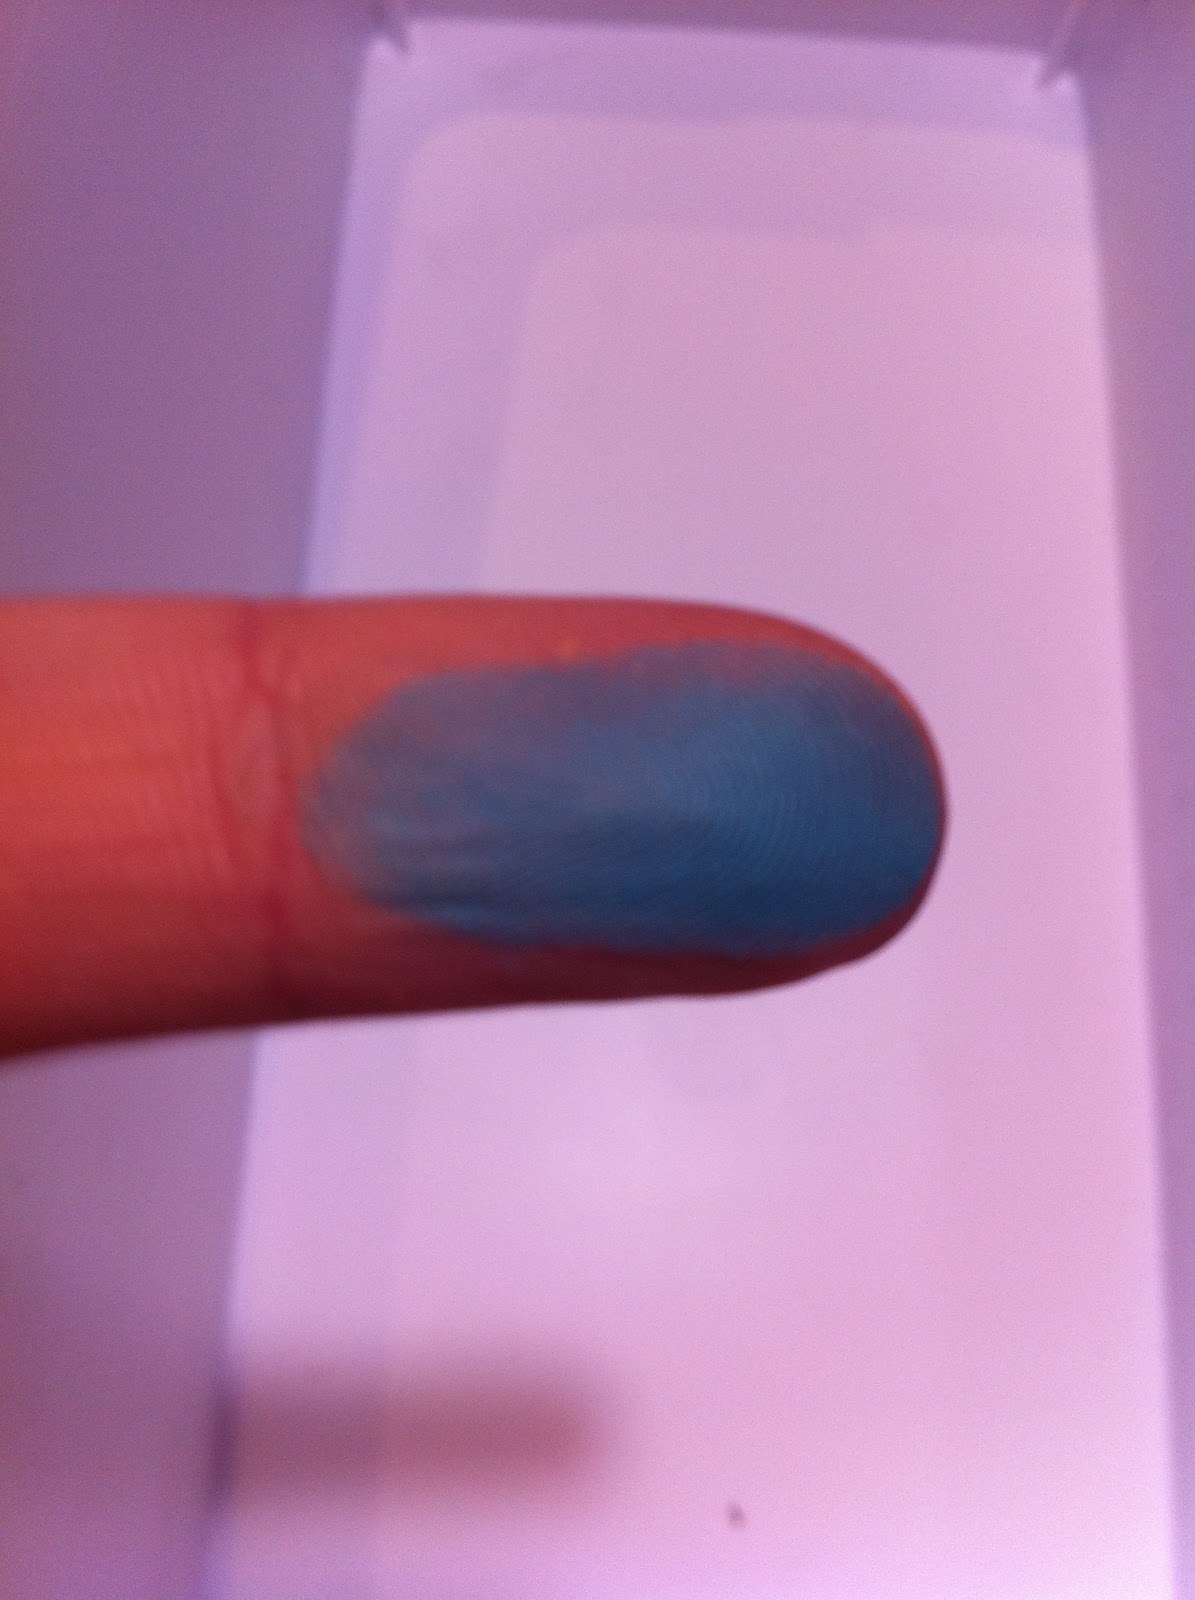 |
| Aqua! Love this blue! It's worth the little bit harder you have to work for the pigment, although it would be fantastic if you didn't. |
 |
| Coral! I don't think this would make a very good eyeshadow as much as it would a highlight color for the cheeks! It's so shimmery.:) Disclaimer: None of the products in this blog were given to me by the company, I did this on my own time and by choice.:) |
Subscribe to:
Posts (Atom)